With winter in full effect, my garden’s heartbeat has slowed, allowing me time to do some of my least favorite housekeeping jobs. Jobs I tend to avoid during the growing seasons. One of those jobs is Bromeliad propagation. As my garden has matured I have acquired a growing fondness for Bromeliads, so I wish to add more. They are great space fillers and do not require much care. However, one of the main benefits of growing Bromeliads is that many are easy to propagate by simply removing the offsets (also called pups). This can be of great value, considering some Bromeliads are quite costly to start with. So with a little effort and some time, you will have a never-ending supply—all from one plant purchase. Most people like to propagate their Bromeliads during the warmer months. With the benefit of a heated greenhouse, I am afforded the opportunity to propagate year round.
I have found that there are two levels of difficulty when propagating Bromeliads asexually. The easiest are the ones with long stoloniferous offsets (Neoregelia and Billbergia, for example). In most cases I simply cut the pup off the mother and put it right back into the ground. Then there is the more difficult level, in which offshoots grow right off the mother (Vriesea and Alcantarea are examples). This blog post will cover the more difficult to propagate Bromeliads.
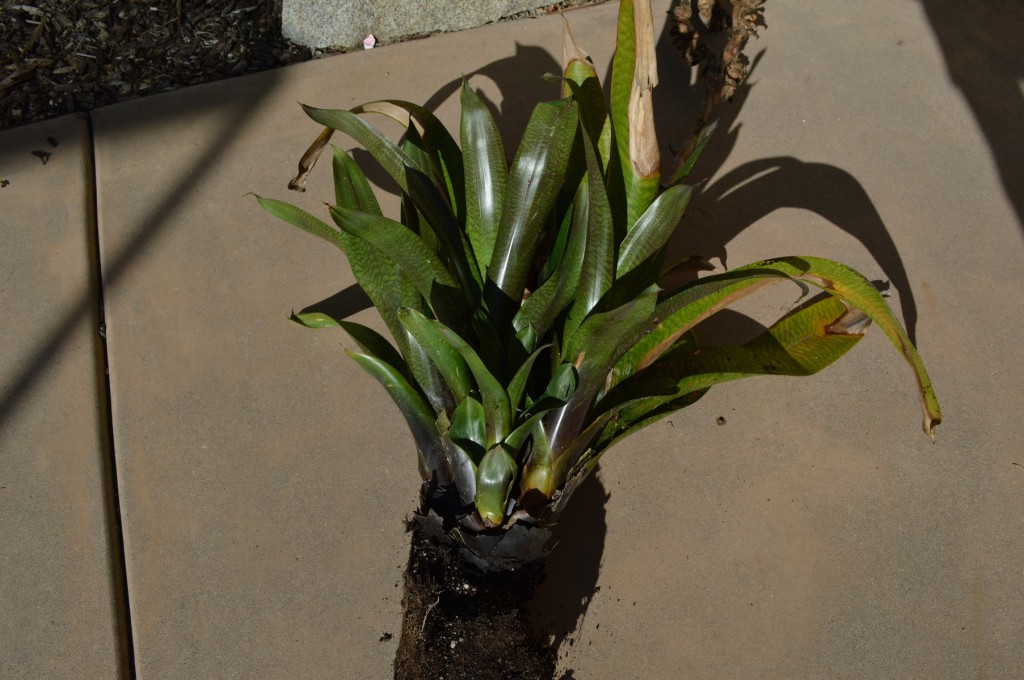
Below is one of my Vriesea fosteriana × hieroglyphica’s hybrids, which I will use to show how to propagate. I figured this would be a great candidate to show how easy propagation is for those that have not tried before. Plus, Vriesea hybrids are on the more expensive side of the coin, so they are the ones I am propagating the most. The first step is to make sure your pups are big enough to be removed. If they are not, they will simply rot once removed. The books say to wait until offsets are 1/3 to 1/2 the size of the mother plant. While ideal, I have found that this is not necessarily a requirement. The key for me is feeling if the pup is solid on the plant, and not soft or easy to wiggle.
Here is my Vriesea fosteriana × hieroglyphica pulled out of the pot and with old leaves peeled away to show you three large pups and a smaller one. All four pups are firmly attached and great candidates for my Vriesea propagation.
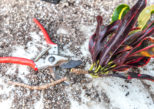
Depending on the Bromeliad, I might use a saw, shovel, sharp knife, or in the case of my Vriesea propagation seen here, I used my trusty Felco 13 clippers. I cut as far in to the mother plant as I can to get the most base for the new pup possible. Pups with some roots are a bonus. Make sure when you cut the offsets that its stem is not cut into. As a general rule, if you cut into any part of the pup where leaves were attached, you cut too far. If you do this, the pup will most likely die.
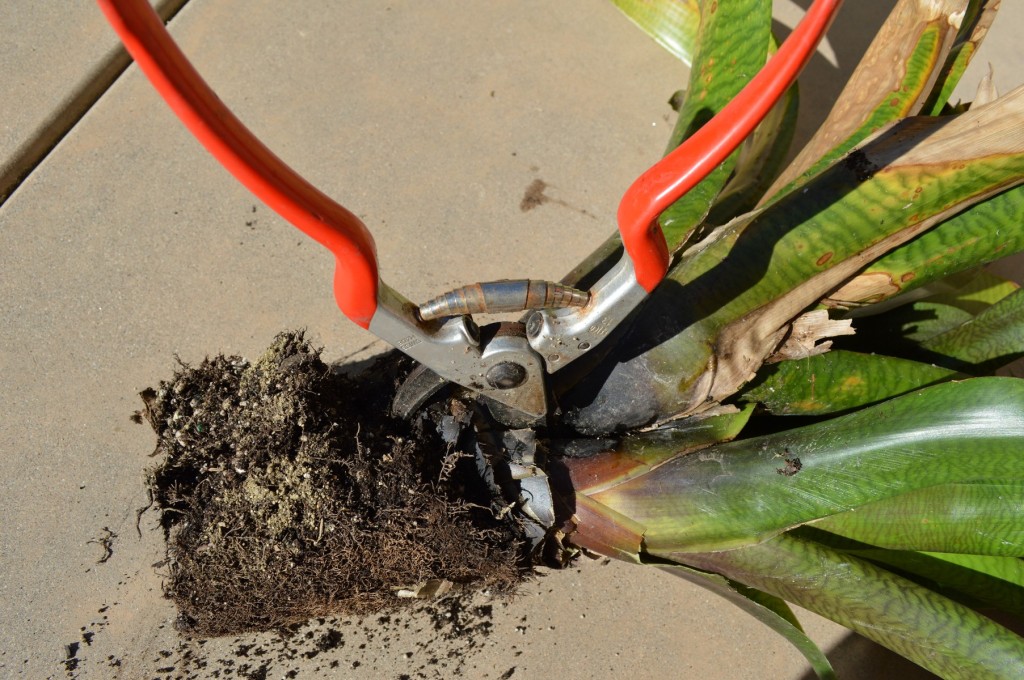
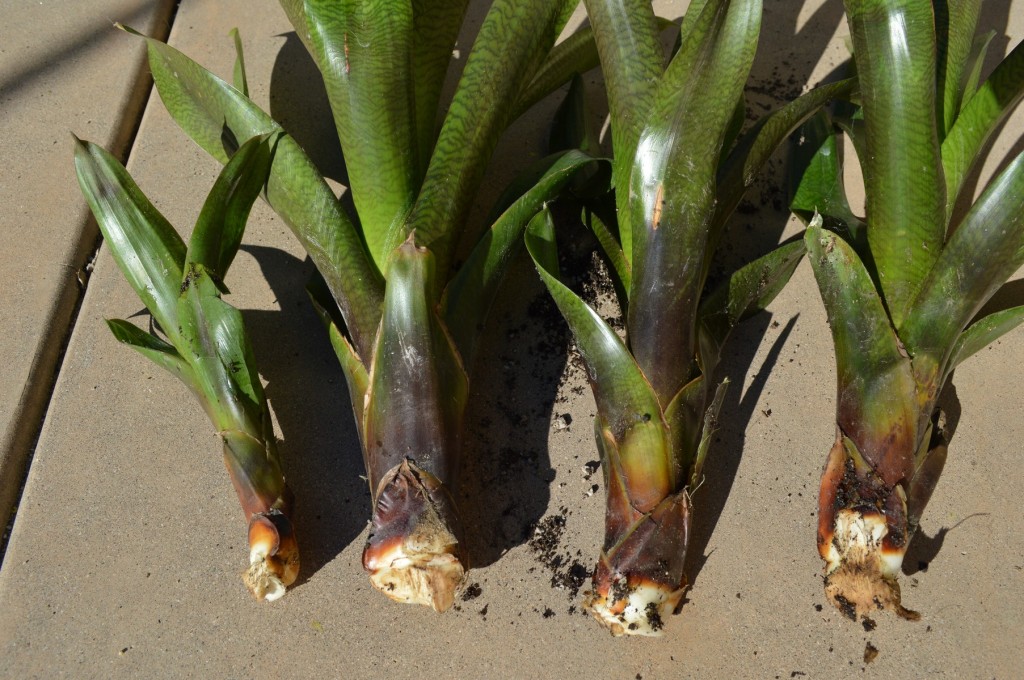
You can see the four pups that have been removed, and all four show a nice base from which to start the rooting process. The smaller one on the far left had to be cut off too. I would have preferred to have left it on the mother plant longer but I could not get to the other three offsets without removing it first.
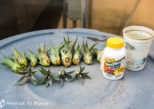
Once the pups have been removed, I clean them up by wetting them down. I know that many people will use a preventative fungicide like Daconil, but I have not found the need to do so. I do choose to use a rooting hormone. In this case I used Green Light® Rooting Hormone with the active ingredient “Indole-3 butyric acid.” I find the stuff works wonders, and I wouldn’t consider rooting my Bromeliads, Ti plants, Cycads, or Plumerias without it.

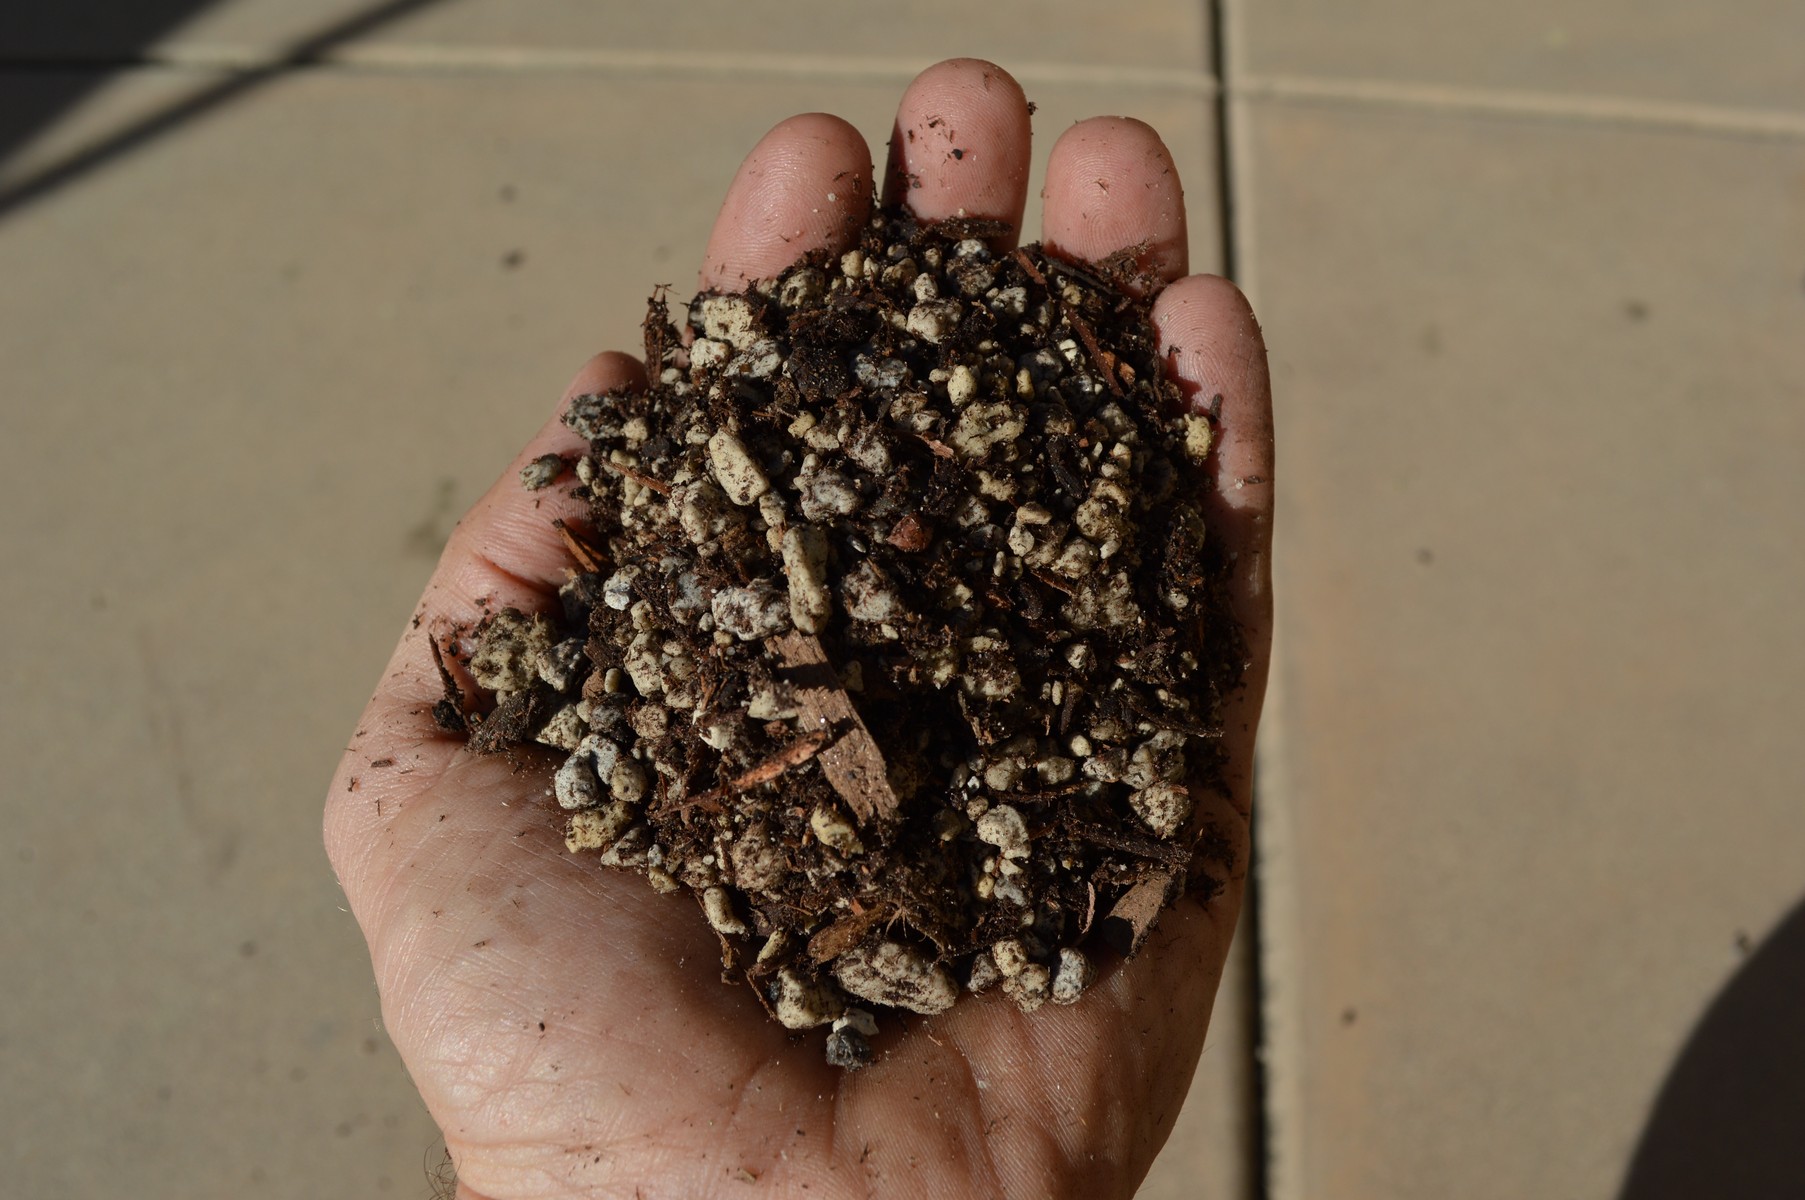
Once the rooting hormone has been applied, it is time to pot the offsets. Because Vriesea fosteriana × hieroglyphica doesn’t have a very extensive root system, I can use a small pot to root the pups in. For my mix I use EB Stone Cactus Mix and cut it with an additional 50% pumice. It creates a fast-draining mix that has some organics in it.
Here are my Vriesea fosteriana × hieroglyphica offsets all potted up and looking pretty. The last step is to decide what to do with the mother plant. Removing offsets from the mother plant can lead some to have separation anxiety. Throwing away the mother plant can lead others to have guilt. I suffer from neither. I chose to throw mine away. Many people save the mother plant because it can grow more pups and they want to get the most out of the plant.
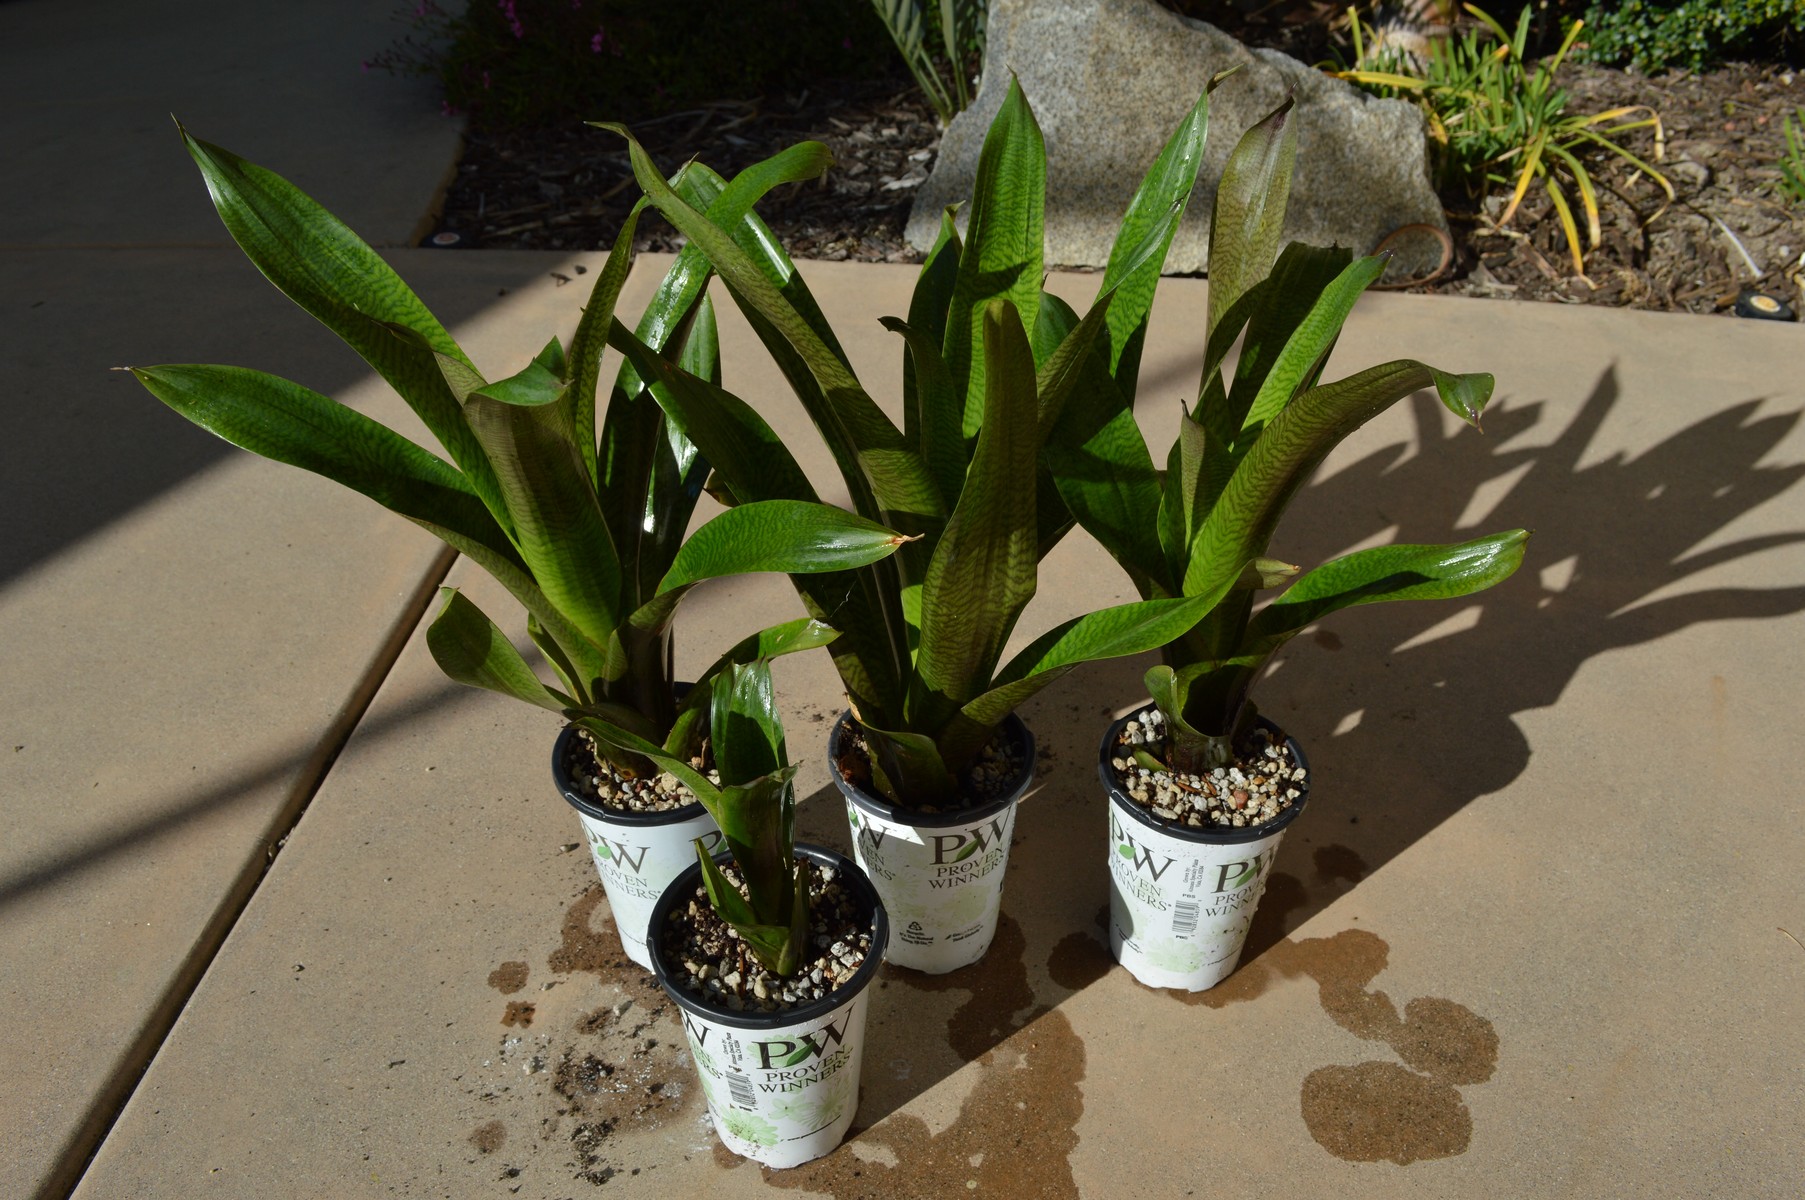
Once finished, they are moved into the greenhouse to root out, and if all goes well, they should be ready to plant in the garden by late spring. Including the four offsets I propagated for this blog post, I also did eight other Vriesea hybrid propagations. All told it took about sixty minutes to do twelve pups. Once rooted in and growing, these pups will have saved me $240 USD or more by keeping me out of the nurseries.

Your description was excellent
What country are you in! We live in Australia and appreciate your valuable information. Have you ever propagated Guzmania?
This is super helpful, thank you! Would you use the same process for Vriesea Splendens?
I would 🙂
Very helpful instructions and tips. Thank you.
I a VRIESEA in a pot (indoor plant) with nine healthy pups around it. Can I put this into a slightly bigger pot so that
1. they grow into a colony and
2. Will they all survive in a group ?
3. Will they all produce flower spikes to get a grand show?
4. Or will only a few produce flowers in the group?
5. Or is it better to separate them into new plants ?
I will be grateful for your advice. Thanks in advance.